本方法于2018-03-18安装成功
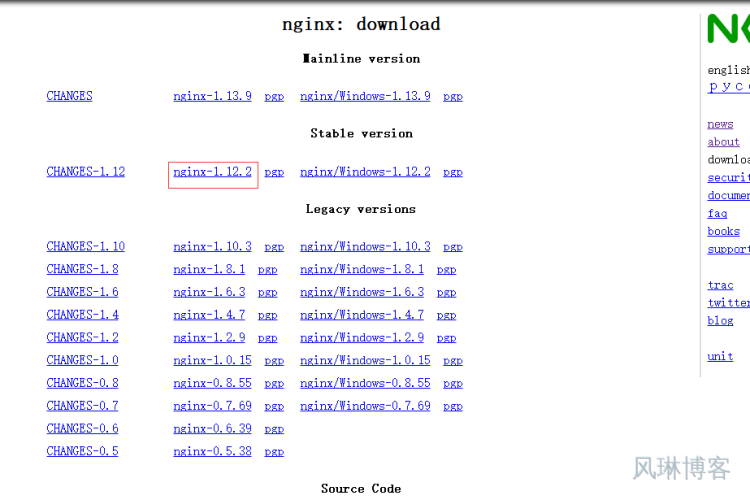
一、下载Nginx源文件
因为安装模块需要重新编译,编译需要用到Nginx的源文件,所以这里还要下载一份。
下载地址:http://nginx.org/en/download.html
cd /usr/local/src
wget http://nginx.org/download/nginx-1.12.2.tar.gz
tar -xvf nginx-1.12.2.tar.gz

二、下载安装LuaJIT
ngx_lua_waf官方推荐LuaJIT2.1版本(2.0或者2.1都是支持的)
下载地址:http://luajit.org/download.html
cd /usr/local/src
wget http://luajit.org/download/LuaJIT-2.1.0-beta3.tar.gz
tar -zxf LuaJIT-2.1.0-beta3.tar.gz
cd LuaJIT-2.1.0-beta3
make PREFIX=/usr/local/luajit
make install PREFIX=/usr/local/luajit

三、下载ngx_devel_kit(NDK)模块
下载地址:https://github.com/simplresty/ngx_devel_kit/tags
只需要解压既可
cd /usr/local/src
wget https://github.com/simplresty/ngx_devel_kit/archive/v0.3.0.tar.gz
tar -xvf v0.3.0.tar.gz
解压后路径,ngx_devel_kit-0.3.0
四、下载lua-nginx-module模块
下载地址:https://github.com/openresty/lua-nginx-module/tags
只需要解压既可
cd /usr/local/src
wget https://github.com/openresty/lua-nginx-module/archive/v0.10.11.tar.gz
tar -xvf v0.10.11.tar.gz
解压后路径,lua-nginx-module-0.10.11
五、编译Nginx
1.切换到Nginx源文件目录,设置环境变量
cd /usr/local/src/nginx-1.12.2

export LUAJIT_LIB=/usr/local/luajit/lib
export LUAJIT_INC=/usr/local/luajit/include/luajit-2.1
2.编译
在yum安装的Configuration的基础上,加上了"ngx_devel_kit"和"lua-nginx-module"模块
--prefix=/etc/nginx --sbin-path=/usr/sbin/nginx --modules-path=/usr/lib64/nginx/modules --conf-path=/etc/nginx/nginx.conf --error-log-path=/var/log/nginx/error.log --http-log-path=/var/log/nginx/access.log --pid-path=/var/run/nginx.pid --lock-path=/var/run/nginx.lock --http-client-body-temp-path=/var/cache/nginx/client_temp --http-proxy-temp-path=/var/cache/nginx/proxy_temp --http-fastcgi-temp-path=/var/cache/nginx/fastcgi_temp --http-uwsgi-temp-path=/var/cache/nginx/uwsgi_temp --http-scgi-temp-path=/var/cache/nginx/scgi_temp --user=nginx --group=nginx --with-compat --with-file-aio --with-threads --with-http_addition_module --with-http_auth_request_module --with-http_dav_module --with-http_flv_module --with-http_gunzip_module --with-http_gzip_static_module --with-http_mp4_module --with-http_random_index_module --with-http_realip_module --with-http_secure_link_module --with-http_slice_module --with-http_ssl_module --with-http_stub_status_module --with-http_sub_module --with-http_v2_module --with-mail --with-mail_ssl_module --with-stream --with-stream_realip_module --with-stream_ssl_module --with-stream_ssl_preread_module --with-cc-opt='-O2 -g -pipe -Wall -Wp,-D_FORTIFY_SOURCE=2 -fexceptions -fstack-protector-strong --param=ssp-buffer-size=4 -grecord-gcc-switches -m64 -mtune=generic -fPIC' --add-module=/usr/local/src/ngx_devel_kit-0.3.0 --add-module=/usr/local/src/lua-nginx-module-0.10.11 --with-ld-opt='-Wl,-rpath,/usr/local/luajit/lib'
make
make install
编译完成后,执行"systemctl restart nginx",重启服务
执行"nginx -V",看见下图的信息,则表示安装成功

六、安装ngx_lua_waf模块
1.从github上获取最新的代码
地址:https://github.com/loveshell/ngx_lua_waf/tree/master
扔到/etc/nginx/conf.d下面(如果是直接编译的,放到对应的conf文件夹下),解压文件,重命名为"waf"
2.安装配置
在nginx.conf的http段添加
lua_package_path "/etc/nginx/conf.d/waf/?.lua";
lua_shared_dict limit 10m;
init_by_lua_file  /etc/nginx/conf.d/waf/init.lua;
access_by_lua_file /etc/nginx/conf.d/waf/waf.lua;
3.配置config.lua
改成wafconf文件夹实际的路径
RulePath = "/etc/nginx/conf.d/waf/wafconf/"
如果要开启日志功能
--是否开启攻击信息记录,需要配置logdir
attacklog = "on"
--可以改成任意目录
logdir = "/logs/hack/"
修改完,保存,执行"systemctl restart nginx",重启服务
4.验证
访问你的网站
http://xxxx/?id=../etc/passwd
xxxx是服务器的id或者是域名
如果出现下图,则配置成功
